Tuesday, 4 December 2018

The Gunmetal Gladiators 3 - Striking Back


Hello everyone, and welcome back to Brighton! (Not in the Dark Ages... let's avoid confusion about that from here on)

On the 24th of June 3063, the Gunmetal Gladiators were informed through their Liaison from the SIMC that the enemy had established a supply base around their Dropships in the valleys to the East, and had made moves to secure a major highway intersection, fortifying it and using it as an artillery base to harass military and civilian targets in the direction of the major population centre to the West.

In light of this information, a plan was put together to move, in force, with the entirety of the Gunmetal Gladiators Mercenary 'Mech Company supported by two Companies of Infantry from the 21st Provisional Garrison Regiment, the local militia regiment they had been hired to support, against the enemy artillery base at the highway intersection in the town of Yantianxiang. This was intended to stop the artillery strikes and, if possible, destroy the enemy artillery capability entirely, and to secure the highway intersection, cutting off the enemy's best path through the mountains towards the city, its drop port, and its HPG.

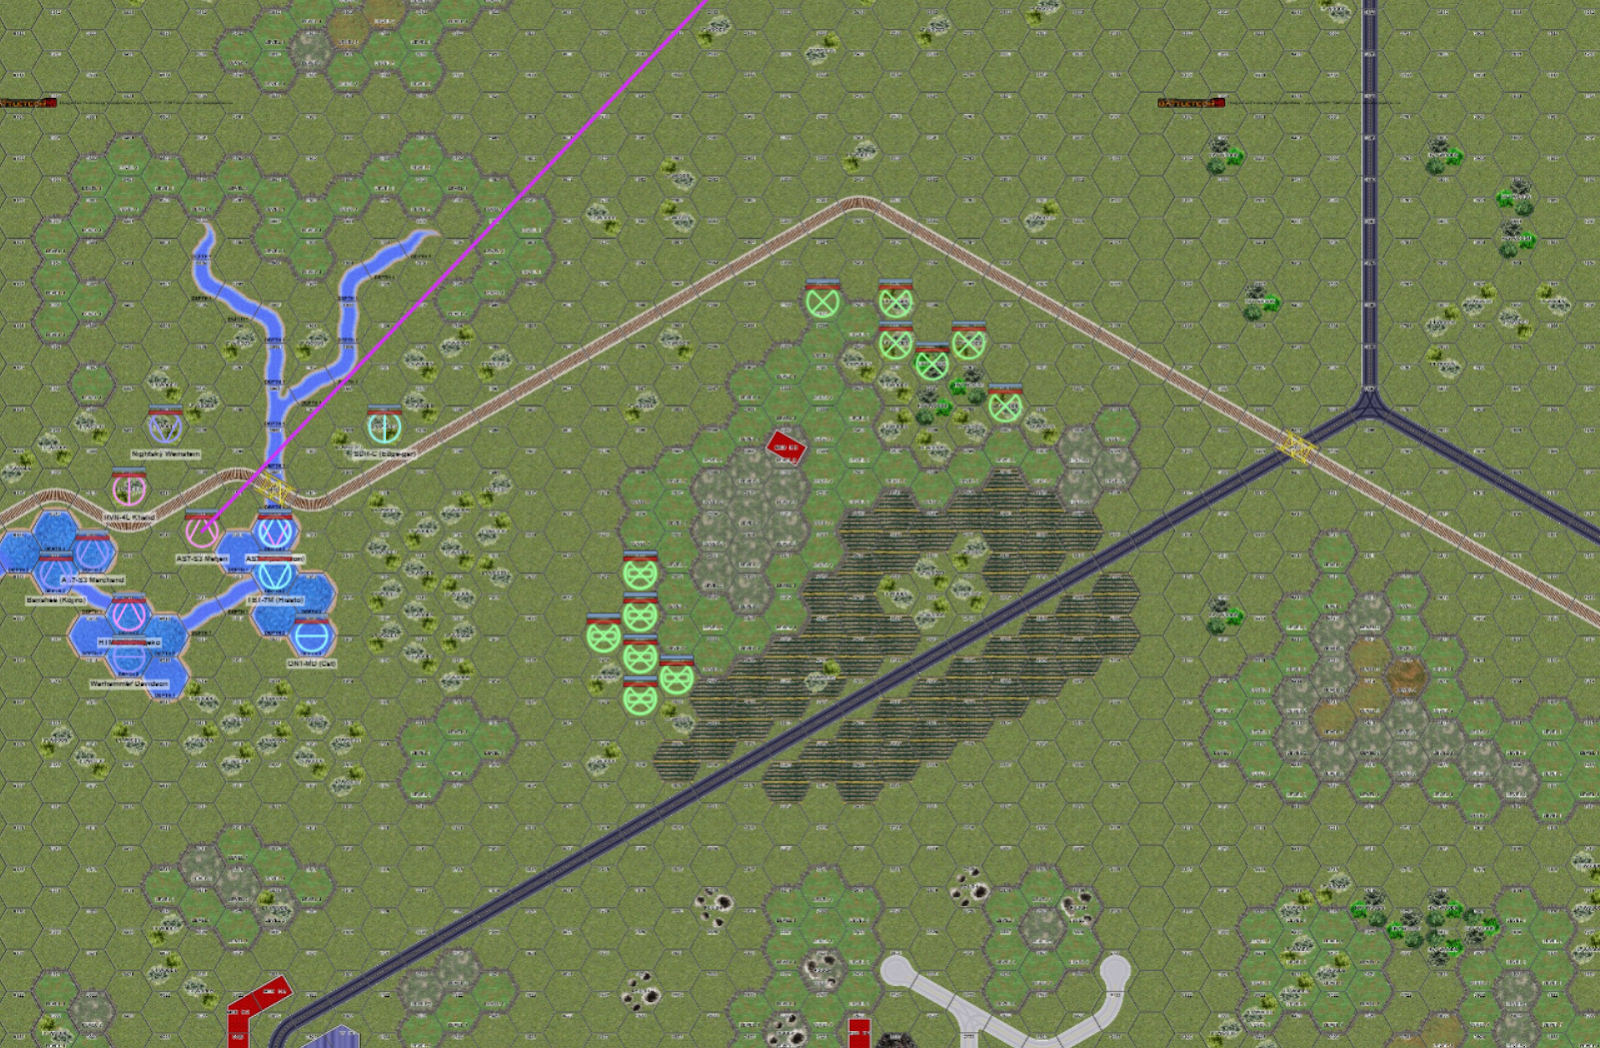
The Map the Gladiators were shown under a modular tent in the afternoon of the 25th.

The plan was disseminated at 1300 on the 25th of June, for execution at 0700 on the following day. In the night, the Gunmetal Gladiators prepared their 'Mechs and moved to the line of departure with 2 Platoon, 1st Coy of the 1st Battalion, 21st PGR, the infantry mounted in hover tanks to help them keep up. At the same time, 3 Platoon was infiltrating forward to observation posts North of the line of departure, to establish observation on the enemy positions in and around Obj Wyvern overnight (giving the players a chance to reveal some targets before they exposed themselves at all).

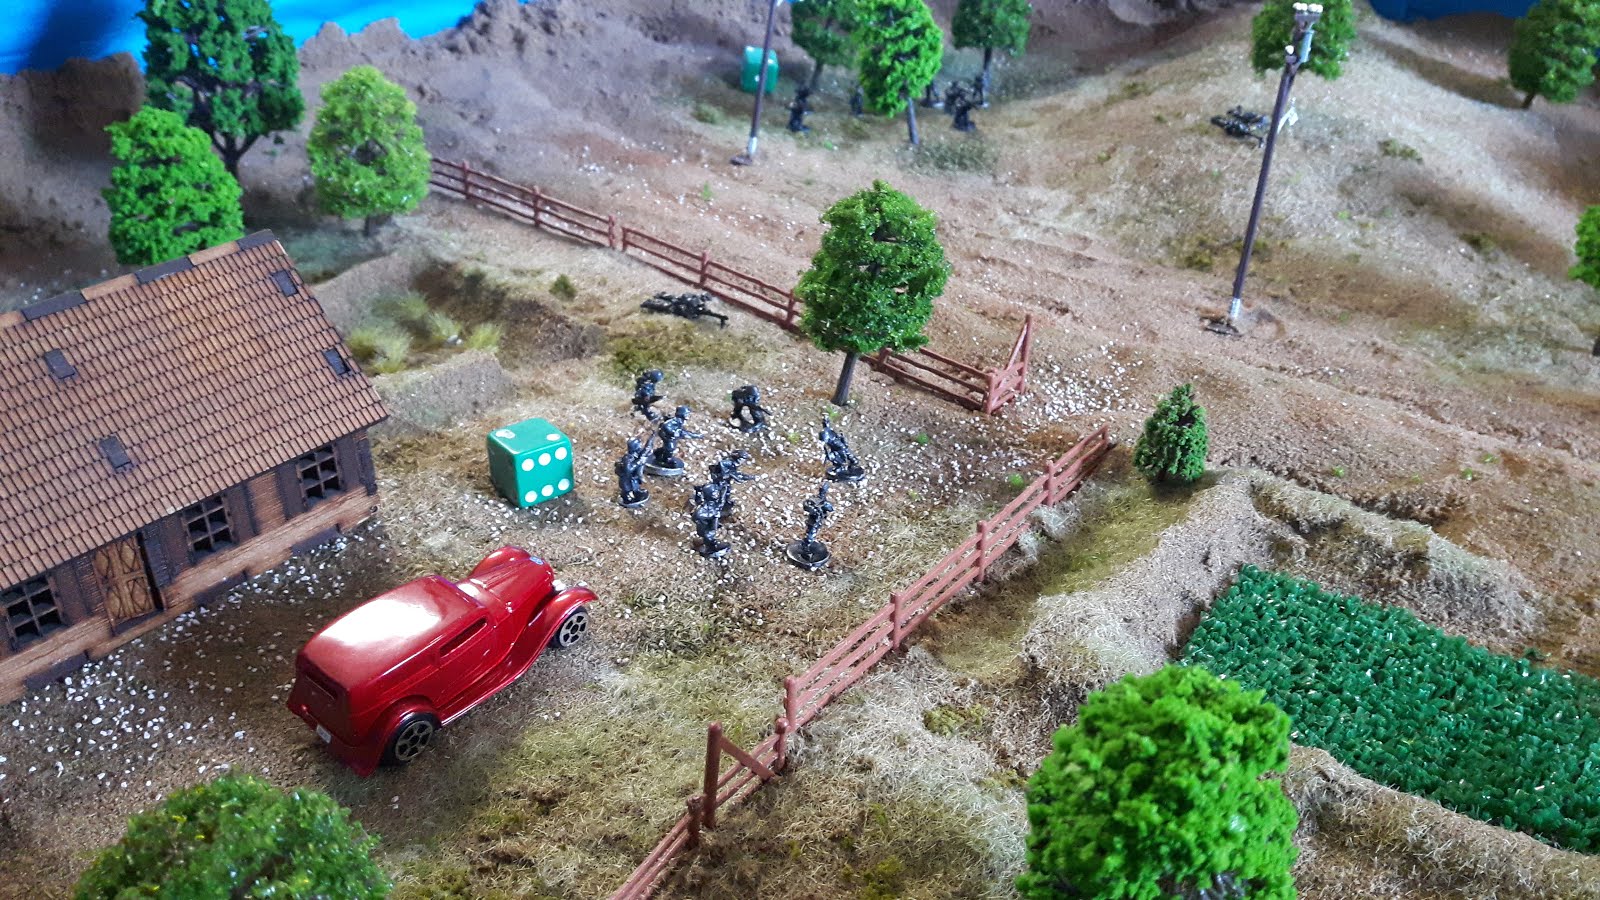
Come daybreak, the forces of the St-Ives Military Command were in their places, troops smoking their last cigarettes and checking straps on backpacks or cooling vests before taking their positions.

The SIMC and GG forces at the start line pre-measure lines of sight and ranges, to determine an early plan of attack.

The Gunmetal Gladiators take up a position to the West of the SIMC forces, and receive the first report of enemy movements on the hill at Obj Wyvern - enemy armour, specifically two Lances of Manticore Heavy Tanks, were spotted moving into position atop the hill under cover of darkness by the dismounted militiamen. A fortunate spotting roll prevents the GG and SIMC from rolling up the Highway as planned, right into the teeth of the waiting armour.

Forewarned of the enemy armour awaiting them, the SIMC troop carriers tuck in behind cover, and the GG prepare to flank the hill from the West.

The Gunmetal Gladiators take the report in their stride and, utilizing her superior Leadership as well as the C3 equipment available to her lance, Cat issues a hurried order to the militia - hold back, take cover, and await our signal. To her company, she issues another. They are to close with the enemy utilizing a covered approach, and engage them to draw their fire, allowing the SIMC militiamen to assault from the South.

Marching their 'Mechs into the waist-deep river and allowing the low ridge to the North to hide the rest of them - a feat accomplished only with some judicious squatting on the part of the company's three (!) Atlases - they close to Medium range with the enemy on the hill, limiting the targeting penalties they would incur from engaging at outside of a kilometre.

The GG, utilizing the Active Probe on their Raven to scan ahead into the small built-up area and ensure it is clear, sneak up along the bottom of the river, avoiding detection from the hill until they all burst forth in unison to unleash a deadly first volley!

The forces trade fire, missiles and projectiles streaking through air ionized by laserfire. On the East side of the hill at Objective Wyvern, a Capellan Mechanized Infantry Lance rushes to reinforce the armoured position, targeting the SIMC volunteers in the woods to the South.

Edgar, monitoring all channels using his C3 suite, manages to get through to the SIMC forces just as he hears something on the known Capellan channels he is guarding - the enemy are aware of the attack, and their Battlemech quick reaction force is enroute. If the Gladiators and 21st cannot reduce the commanding enemy position at Obj Wyvern in time, they may not be able to eliminate the enemy artillery or seize the town. The clock is against them now. (In game terms, we rolled 1d6 every turn after fire was first exchanged, adding the results towards a target number that, when reached, would trigger the arrival of the QRF)

The SIMC forces, hearing the signal to advance, fired up their hover transports and rushed forwards from  the South, dismounting infantry into cover as they approached to double their firepower at close range and avoid the troops being killed as well, should the transport be destroyed.

Unbeknownst to them (by a reaction rolled for the hostile force), the enemy had already decided to focus on the Battlemechs before them, planning to mop up the militia afterwards. Perhaps they did not know exactly how many 'Mechs were coming out of the sunrise towards them, but this meant that the particularly vulnerable militia did not suffer nearly as badly as they might have, even after another lance of Capellan mechanized infantry turned up in the hills near a gas station to the East.

Moving in unison with their employers, elements of the Gunmetal Gladiators rush the hill at Obj Wyvern, hoping to force a conclusion to this fight in time to face the enemy 'Mechs charging in from the North East.

The 'Mechs, supported by the infantry and their carriers with the handy ability to indirectly fire on targets, pressed the hill and after a round or two of short range fire, shattered the morale of the remaining Capellan forces. The Capellans, watching their tanks burn under sustained laser and missile fire, began a hasty retreat towards the town, while the SIMC hover vehicles gave chase. Behind them, the SIMC militiamen set about tending to their wounded, taking prisoners, and looting destroyed enemy vehicles.

As reports come in of hostile 'Mechs on the North-East, the Capellans attempt one last ditch attack with their mechanized lance into the flank of the SIMC militia. They inflict some casualties, but, being isolated from the rest of their retreating force, are cut down in the open.

The Gunmetal Gladiators, receiving hurried reports from seismic sensor operators among the SIMC, see a number of new sensor contacts resolve to the North East - the QRF has arrived. Being only two Lances of enemy 'Mechs, they are still outnumbered by the GG and SIMC in the area, but the fortified town could give them a significant advantage in a firefight. The GG, sensing their opportunity slipping, dispatch their Light 'Mechs, accompanied by Weinstein in her Nightsky, to the North, hoping to destroy the Chapparal Artillery Tanks before they can get away.

The GG Heavy and Assault 'Mechs take up positions on the hill to fire into the town, while their lighter comrades rush North and engage the now-exposed artillery position.

Davidson pushes forwards to identify the enemies, and is immediately hammered by enemy fire. The Capellans, feeling daring, have positioned several 'Mechs on the rooftops, including a Sha yu, an Ostroc and a Jinggau, some particularly Capellan models. These 'Mechs mercilessly tear Davidson's Warhammer apart, ripping off weapons and damaging its gyro as they only narrowly fail to destroy its engine. This proves to be the only serious casualty the GG will take, however. Their return fire tears into the Capellans in turn, bringing down the Jinggau. The Capellans, understandably, wither under that weight of fire, and choose the better part of valour. The Jinggau is grabbed by a functional 'Mech, and the lot of them begin a fighting retreat.

The Capellans crowd the road towards their landing zone, hurrying back to conserve their forces. The last casualty of the battle will be a Chapparal Artillery Tank, caught by fire from the Light 'Mechs as it rushes to join its comrades in flight.

At this point, the SIMC and GG forces stopped their pursuit, choosing instead to turn to repairs and casualty clearing. They had once again gained the initiative in the campaign on Brighton, and would use the time they had bought wisely, salvaging and repairing for what may be a final push into the enemy's dropzone.

The final tally - only three SIMC militia squads put out of commission, for almost two companies' worth of Capellan casualties, not to mention prisoners of war and the inevitable salvage!

The Gunmetal Gladiators walked away from this with some repairs to do, but also with a number of hover transports, a tank, and some Arrow IV artillery to their arsenal. The cost of upkeep of those will be high, not to mention the fact that they do not have the staff to operate all of that equipment at once, but it is a good start to becoming a next-level company, should they be able to hold onto it all. 

Returning to base, the usual after-combat activities occurred, with the MechWarriors taking some rest while their AsTechs get to work. Notably, Davidson and two others had a deep discussion about what they would do when they eventually retired, Davidson in particular contemplating whether his little undercover adventure was worth the risk.

As well, Khalid, the cameraman, has become something of a malingerer, using his work as cameraman and editor to dodge other duties around the camp, and the romance between Shigeko and Marchand has deepened, with the former having found a cute necklace while salvaging the damaged hover vehicles and giving it to the latter as a gift.

That is all for this session, but tune in next time to find out if the Gladiators can close this contract off with a great success, or if Brighton can expect yet more war on the horizon!


Wednesday, 14 November 2018

Form Line of Battle Report!

Ahoy everyone, and welcome back to the Dark Ages!

Finally have another battle report, this time of a game of Form Line of Battle, a ruleset for battles in the age of sail.

Given my choice of profession, it's a wonder I don't get around to playing more naval wargames - wait, no it isn't. Naval wargames are notoriously time consuming, complex and space hungry. At least, that was what I thought before breaking out Form Line of Battle.

Certainly, the game still requires a decent amount of space, but the rules are at least able to be taught and played very quickly in their basic format. They also include a huge amount of optional rules, so that as you become more familiar with them you can make the scenarios progressively more complicated as you go without having to worry about any of that when you first go to smash two boats together.

Rather than just smashing two ships together, however, when I first built the ships for Form Line of Battle, I chose an asymmetric scenario to make it interesting. The wikipedia article on it is here: https://en.m.wikipedia.org/wiki/Action_of_13_January_1797

The gist being that a larger French ship is attempting to escape two smaller British ships, hungrily nipping at her heels as she runs for home. The French ship is played with a poor crew, which makes both reloading and maneuvering harder, but has decent ability to shrug off incoming attacks and deal damage of it's own when its weapons are loaded.

Asymmetric scenarios are, in my opinion, often more interesting in any wargame,  and terrain is the real meat of any scenario. By default, this scenario has been played with no terrain a few times in the past, though last time we spiced it up by playing around a Cape of land with rocky waters posing a threat to a French ship trying to cut the corner.

This time, we laid out very crowded waters somewhere in the Caribbean, at the center of which lay a small French port overlooked by a gun battery. The Droits de l'Homme (DDH from now on) is running from the Amazon, a smaller and normally nimbler British vessel as it makes for Notre Dame dont la Purite Reste en Question, where the governor will greet her crew with wine and cheese of the finest quality for having run the blockade.

Ahead of them and to the East, HMS Indefatigable cruises among the islands, only just having been warned of the French Ship of the Line running the gauntlet.


DDH at the bottom of the photo and her destination on the isles near the corner of the suspiciously brown sea - note the amount of space required, typical of naval wargames. Indefatigable lies in wait at the center right of the photo, cruising through the islands.

Amazon watched DDH riding favorable winds, and tried her luck early on, altering hard to starboard to fire her port broadside - particularly potent when employing the first, carefully loaded volley of the battle - into the French ship's exposed stern.

Thunder rolls across the clear brown seas of the Caribbean, and iron balls soar. The English shot batters the French crew, but they respond, as Montcalm so famously put it, by the mouths of their own guns.

The damage to both sides is not significant to end the chase, despite the excellent position of HMS Amazon - her gamble had failed. Aided by a favorable turn of the wind, DDH rapidly pulled ahead and made for the islands.

Amazon's crew would do their best to pursue, but the failure of their first shots must have rattled the crew. She would play no more part in the chase.

HMS Amazon, at the top of the image, lags ever further behind, but the French crew are startled by the cry from their lookouts - topsails peeking out from behind the small islands ahead, and the royals of another English ship. They are not safe yet...

The chase now lay in the hands of HMS Indefatigable's capable crew, who hurried to place their ship in the DDH's way. By chance and hard work, they managed this almost exactly, crossing DDH's proverbial "T" just as she entered the narrows between First and Second Obstruction Reef. 

HMS Amazon's crew struggle to make the best of the shifting winds, as the first echoes of gunfire reach them across the Caribbean sea. Less than a mile away, the silhouettes of friendly and enemy ships merge, and are wreathed in the sickly grey smoke of cannonfire.

The fight is short, sharp, and intense. Against all odds, the French crew, rated poorer in quality across the board, keeps up pace both in maneuver and gunnery with the British Frigate, giving as well as she receives.

HMS Indefatigable, desperate to slow the French for HMS Amazon to catch up and assist her in bringing the beast down, refuses to alter as she closes DDH.

Once again, against the odds, the French crew pull together and, in a spectacular display of seamanship, come hard to starboard, clearing Indefatigable so narrowly their captains can sling insults at each other over the sound of musket and cannon.

The maneuver by the French seems to put her in quite the bind, however. Though she has avoided being spotted by a desperate English warship, she now finds herself pointed squarely at a reef with a shoal nearly adjacent. The British, though they are smarting from the exchange of fire, have a laugh, counting on the French doing their job for them in the next few minutes.

HMS Amazon, only now entering the island chain, watch as the two ships pull apart through clouds of oily gunsmoke. Through his telescope, the Captain has a chuckle at the predicament of the French vessel, though it dies in his throat as he watches her mast swing over.

For the second time back to back, the DDH's crew succeed on their seamanship check to make a hard alteration, this time shooting the gap between the rocks and the reef.

The situation at game's end, with Indefatigable sailing West and struggling to come around, though to do so would put her under the shore guns all too quickly, and Amazon still out of the fight. 

For reasons of time constraint, we called the game there, though I should note that it took only about an hour, perhaps a bit more, to have such a ringing game. By the end, the British cut off their pursuit in the face of terrain and the threat of shore batteries, and the French were allowed to limp into port, not even damaged enough to slow them (though their gunnery abilities were significantly reduced).

My friend played the French this game, while I played the unsuccessful British hunters. A hearty congratulations to him and his crew for their able handling of the difficult situation, and of course these ships will meet again on the high seas someday, so look out for that here!

Wednesday, 22 August 2018

Painting update!

Hello everyone, and welcome back to the Dark Ages!

Quick one today, just a couple of pictures of some painting in progress and some comments. First, the pictures:


These are my current project- the A Song Of Ice And Fire miniatures, by Cool Mini Or Not. The kickstarter shipped recently, and I was genuinely pleased with all of the minis as well as - surprisingly - my first read of the rules. After I get to playtest them, I fully intend to review the lot (probably long after the buzz has died based on how slowly I paint).

(Note also the picoarmour cold war units off to the side of the Tully Sworn Shields, for the Bledore/Sablenoir project)

The painting speed issue is what I am trying to work on now - partly with new techniques, and partly by philosophy. The new techniques come from an interesting discovery. Did anyone else know that sharpies show extremely well on a pale primer and leave very bright colour? For these fantasy medieval characters, I am working that in with heavy ink washes to get troops that really pop.

I had discovered the value of metallic sharpies when working on my Warhammer Quest characters in the past, but only now am I getting into using the plain color sharpie markers and it is helping seriously speed things along.

From the philosophy side of things, I am trying to stop being so picky in my paint jobs. Creative blocks or hangups about "making mistakes" often result in me going weeks at a time without painting, and I can't afford that if I want to keep up with all the projects I've placed on my plate, haha. As it is, with these, I am now putting a big emphasis on just getting painting done. Even if something isn't quite right, I can always strip it and do it again later, but at least for now I have painted minis for the tabletop. 

Hopefully that will mean I can break out the asoiaf minis and have a good few games, both with their own rules and my own homebrew, before too long.

That's all for today, thanks for reading!

Thursday, 2 August 2018

The Gunmetal Gladiators! 2 - First Blood on Brighton

Hello everyone, and welcome back to the Dark Ages!

When last we left off, the Gunmetal Gladiators had been contracted by the St-Ives Compact, called to defend a border world against Capellan Raiders to free up valuable regular forces for use on other fronts.

Before leaving, Grant Johnson, a follower of the Kuritan Baron and pilot of one of the Company's two Atlases, commissions some upgrades to his ride. These involve a rather complex series of replacements among his weapons and a large number of man-hours of work - these factors combine to mean that his relatively new Techs make a couple of mistakes that cannot be immediately noticed or rectified. One, damage to his 'Mechs knee actuators that would make Death From Above attacks more dangerous, is not particularly worrisome. The second, a malfunction in the 'Mech's ejection seat that means an unlucky pilot will be locked in his 'Mech's cockpit if it is killed, would be more worrisome if it were not for the fact that Johnson pilots an Atlas, among the most well-armoured and armed 'Mechs in the Inner Sphere. It could never be destroyed. Never.

20 days later, the Company lands on Brighton. Barely a day later, they are pushed into the field by their Liaison Officer, ordered to defend a friendly force providing humanitarian aid to a local village struck by a landslide.

The terrain in the Gladiators' Area of Operations is mountainous, with a few valleys, surrounded by jungle, containing roads that lead to the area's main urban centre. These mountains, however, have been upset by the gunfire of the last month, and so their muddy slopes have been of great risk to mountainside villages for a couple of weeks now. The ability to bring supplies out to a stricken community would do a lot to bolster the morale of a population that was conquered recently enough and is already seeing more combat.

The Gladiators' two Heavy 'Mechs, the Warhammer of Baronet-in-disguise Davidson and the Orion of Company Commander Cat, check their ranges to the advancing Medium 'Mechs, as yet unidentified visually. Their Weight Class can be established by our magnetic imaging and seismic sensors.

The enemy, who have largely been running rampant over the area of operations so far with their two companies of BattleMechs being opposed only by Ground Effect Vehicles and Irregular Infantry from the planet's garrison, have sent a Command Lance, a Medium Lance, and a Recon Lance, amounting to a mixture of heavy tanks, BattleMechs of various weights, and infantry for securing the supplies. They intend a show of force, and were not prepared for a full Company of Battlemechs to meet them in the field.

The first shots are traded, and the Uziel of the reality show's main character, Jingfrei, is immediately brought down by focused Gauss rounds from the Rommel Tanks advancing from the West. The highly accelerated slugs crack audibly, even through the canopies of BattleMechs, as they soar between the trees to core the Medium 'Mech without any other warning. The entire Company is quickly shaken to the core - their comrade's fate will be uncertain until they can occupy the ground and identify if he ejected successfully. Failure of the mission will leave them unable to confirm even that - he would then be either a POW or dead, to be determined at a later time.

The Gladiators, having seen the power of the enemy heavy weapons and knowing that they are to be on the defensive in any case, cling to cover and prepare to slug it out with the enemy. The enemy, on the other hand, opts for an aggressive approach. Focusing their fire on the largest target in sight - Johnson's Atlas - they push into the river bed, their tanks taking a hull-down position as they tear up the trees around the 100-ton monster.

Against all expectations, the Atlas collapses, setting fire to the trees nearest to it and crumbling into a pile of screeching metal. Another comrade having fallen to the enemy, the Gladiators step up their efforts further. Kojiro, the Banshee pilot accompanying Davidson, takes up position ahead of the friendly infantry, drawing a great deal of fire that would otherwise be directed at them. (Over the course of the game, the Banshee would be reduced to a single point of structure, but with more attacks missing than hitting, survive while having saved the infantry from many shots that could have been sent their way otherwise)

The Nightsky, piloted by Weinstein, Knight of the Federated Commonwealth, leads the lighter 'Mechs in routing the enemy Medium and Light Lances and clearing the South of the field. The Heavies will begin falling back shortly.


In the meantime, the Gladiators' Light and Medium 'Mechs press the South of the enemy forces, and with the combination of concentrated laser and missile fire and the judicious application of the Nightsky's hatchet, drive the enemy from the trees. At this point, it becomes clear to the enemy commander that they have been beat by this unexpected force.

It is too late, however. Their fighting retreat gives them the chance to retrieve some of their destroyed units to prevent them being salvaged, but their Atlas goes down while covering their rear - it is a machine meant to attack, its speed not allowing for a very elegant retreat at all.

The Gladiators' first engagement has been a resounding success! Per their contract, half the salvage goes to the employer, but this still allows them to claim the Atlas, which will be distributed to a worthy pilot for the next battle.

Jingfrei escaped with no injuries, his ejection seat having functioned as intended and thrown him clear of the Uziel when it was felled in mid-stride.

Even Johnson, with his faulty ejection seat, managed to pull himself from the cockpit before the flames rolled over it, escaping with only some injuries after all.

The final tally - 5 damaged 'Mechs for the Gladiators, 4 destroyed for the enemy, as well as a Squad of Heavy Infantry and two Rommel Tanks.


In the down time while the commanders planned their next move to exploit the victory that surprise had given them - and prepared for a more organized enemy force to face them next time - the characters got up to some randomly generated events. Edgar, Light 'Mech pilot of the Drac Baron's Lance, took up Charcoal Drawing, while Marchand and Khalid, pilots of the Locust and Raven respectively, had a romantic entanglement, perhaps fuelled by the adrenaline of their first combat experience as a company. Davidson, the undercover Baronet, and Cat, leader of the Gladiators, went out afterwards to meet the civilians they had helped supply, and become known to the local population - it was not long before the holovid star was pitching this to local news networks, and offering them all access passes to the finest cuts of the footage being recorded by their Raven.

Tune in next time for the next operation on Brighton, as the Gladiators continue their first week of combat operations!


Monday, 30 July 2018

The Gunmetal Gladiators! 1 - Training on Outreach

Hello everyone, and welcome back to the Dark Ages!

Recently, I have begun a campaign of MechWarrior 2nd Edition with a couple of friends, combined with the Alpha Strike rules from Catalyst Game Labs and some random tables from various old Battletech Field Manuals. So far, it has been an eventful first few sessions that I'll be happy to relate - but first, some observations.

First, I will note that I am using the online role-playing game service Roll20 (roll20.net). This is an extremely robust system for gaming with custom tokens and all sorts of music with friends at a distance. It's not as kinetic or - I would argue - as easy to pickup and work with as actual miniatures, but it has definite advantages as far as space and resources go.

Two Lances, having just met at the Hiring Hall on Outreach, square off to determine who will be in charge of their newly formed Mercenary Command


In real life, there is a cost for every duplicate 'Mech you want to field, that means I will almost never have doubles of anything. Similarly, I only have so much table or floor space for laying out battlefields in reality. The virtual world has far larger limits where space and terrain are concerned as well. Roll20 also allows for fairly easy play with Probable Enemy Forces (by hiding unit information until LoS is established), meaning our Cooperative play is feasible with a minimum of off-table bookkeeping.

Roll20 has some downsides as well, though. The interface does not always allow for every option I would like - tracking Heat, Armour, Structure, Critical Hits etc are not nearly as easy as they are with printed Unit Cards, but printed Unit Cards are impractical when playing at a distance as far as sharing information goes. This can be mitigated by using the available status bars for tokens, but takes a bit of work. Additionally, where it comes to laying out terrain in large amounts, the slight lag in the site both in terms of controls and the site's likely not having been designed for large numbers of tokens makes it frustrating to make large areas of terrain - so far, we have not had a battle on an area of a size that would really take advantage of the digital medium. I'm planning to try compensating for that by just using photos of my mapsheets from the tabletop in the future, but these do not quite line up properly when adjusted for the site, and their textures differ quite a bit, so tiling them may look somewhat incongruous. We will see!

The last mechanical factor I want to discuss is the MechWarrior 2nd edition character creation system. While I like the ideas of the Skill selection and academy packages, and I can see the "balancing" aspect of the priority system, we did not like what it did to our characters. Random character creation is a feature I like quite a bit, as taking away some control from the players can make for very interesting characters. This priority system, however, gives a large amount of control to the players, while simultaneously seriously limiting them. It seemed to us that the only way to get someone half-decent (even if they had attended a prestigious combat academy!) was for them to drive a Light 'Mech! By prioritising 'Mech in order to get an Assault or Heavy, they seriously compromised either their Attributes or Skills and condemned themselves to a 7ish+ target number (!), that would easily be compounded to a 10 or more when the enemy did literally anything to earn them some defensive modifiers.

Two Lances of the newly-formed Gunmetal Gladiators engage in a simulated exercise on Outreach against two Lances of AI-controlled opponents


Referencing the Alpha Strike Manual, a Target Number for Regular force soldiers should generally be about 4... 7 is the cutoff for absolute newbies, which we all agreed should not have been the case for Academy-trained MechWarriors! As such, we adjusted all Attribute points allocated to all characters up by 4. This objectively made them fairly overpowered from MechWarrior 2nd Edition standards, but at least made them worth playing in Battletech/Alpha Strike...

The other resources I have been using are No End In Sight and FiveCore, both by Nordic Weasel (FiveCore Company Commander has previously featured on this blog! https://darkageaaron.blogspot.com/2017/04/bledore-vs-sablenoir-skirmish-on.html ). The random tables and guidance for Solo Play AI behaviours, combined with some common sense and unguided rolls between decisions, mean that even though we are playing what should be a Game Mastered system, all three of us are participating as players. I am able to serve as a Pseudo-Game-Master while not compromising my own ability to play and be surprised by the events.

On to the game itself! Each player (3 of us) generated four characters, coming to a Lance each. Many of them were randomly generated, with everything from Priorities to 'Mech assignment rolled for, with a few items cherry-picked to taste.

This resulted in a lance composed of a Kuritan Baron, away from the Draconis Combine, and his entourage, one lance composed of the cast and producer of a 'Mech-based reality show from the Magistracy of Canopus aiming for stardom in real combat before hitting the Solaris VII arenas, and one lance (my own) composed of an unlanded Baronet from the Federated Commonwealth, a servant and two Knights, all undercover and on the run.

Our game takes place in June of 3063 (though we are not paying too much heed to authentic timelines), when all three Lances, with whatever Battlemechs they managed to filch or inherit, meet on the mercenary world of Outreach. The world of Outreach, granted to the Mercenary group Wolf's Dragoons after the Fourth Succession War and having only gained in renown after the invasion of the Clans, calls to any aspiring mercenary, and its multi-spired Hiring Hall offers the location for strangers or old friends to meet and form Mercenary Commands of their own in search of money or freedom.

(It's worth noting that the Field Manual: Mercenaries has some rather scathing statistics about the lifespan and salaries of most mercenaries - if we manage to stay solvent and survive more than a year, we will have beat the odds by far!)

Our characters come together in matches in the simulators, and ultimately the leader of the Drac Baron's entourage, Cat, pilot of a mighty Orion, is appointed leader of the newly-minted Gunmetal Gladiators!

Cat's Light and Medium 'Mechs, a Spider and a Trebuchet respectively, sweep around the holovid stars' Southern flank and bring down their camerawoman in her EW-equipped Raven. They will shortly cut apart the rest of the Lance - in the simulator of course!

As soon as that is sorted out, they put out for contracts - due to the high level of technological advancement (two Atlases and an Orion will do that for a Merc!), the Lance receives a more favourable rating from the Dragoons than may have been expected from their numbers, and before long they are approached by two negotiating teams. The first, from the St-Ives Compact, is to hunt and engage raiders from the Capellan Confederation on the recently conquered world of Brighton. This promises two months of fairly active combat. The second, a Garrison contract on a FedCom world, is immediately discarded by the impetuous bunch, and so they pile onto a DropShip to catch the next train of Jumpships to Brighton!

Tune in next time for the next phase of their story - their first live-fire encounter with Capellan forces on Brighton!

Wednesday, 13 June 2018

Quick Update!

Hello everyone, and welcome back to the Dark Ages! After a long hiatus (mostly from gaming, less so from painting and planning!) I've managed to get another game on the table!

This time it was just a quick round of DBA3 with my wife, who was kind enough to indulge on a slow evening. We r.ployed my Wars of the Roses Yorkist and Lancastrian armies, on arable terrain with a city in the center.

Since I forget which army is which, I will refer to them as red and blue.

Red (myself) was defending, so I set up my army in a battle line across a field, with one unit of Blades detached to hold the city, and a unit of Psiloi detached into the woods on my left. Blue set up opposite, with no terrain of note to deal with. On the first bound, we established that the fields were dry and hard, offering no terrain penalties.


Both armies pressed forward, and Blue's Blades threw themselves into the fray in the city - with extraordinary luck, they immediately routed the defenders, and set to plundering!


The rest of Blue's army advanced and dressed off to face Red, and we were set for a general advance until Blue's general began shuffling her forces, trying to bring more bows to bear and maneuver her piles around the city to join in.


Sensing opportunity, Red's general and his Knights rushed forward and hit the enemy's left. In the ensuing melee, Blue lost Blades, her General, and her Psiloi, leaving the Blue army routing in tatters, and the path open to her camp for the impetuous Knights.


All in all, it was short and sweet as all DBA3 games are, and despite having lost familiarity with the rules over time we picked them back up reasonably quickly (though we may have played cities wrong? With the exception of one lost unit for Red the city had little effect on the battle overall).

It is also always fun to break out the sand table. It is very well suited to DBA, allowing one to go through the terrain setup quickly and kinetically, and providing, in my opinion, a much more aesthetic effect than terrain plonked on a mat possibly could.

Until next time!

Monday, 4 September 2017

20th Century Wargame test

Hello again, and welcome back to the Dark Ages!

I know it's been a while, but real life and distractions tend to have that effect on my blogging. I have something new to document, and it's kind of cool in my opinion, though, so here I am!

For a little while, I've been tinkering with some rules for 20th century wargaming on the tabletop. Well, I've been tinkering with many rules, but these are the ones that are of importance today, as I have finally put them to the table for a playtest!

Wildman that I am, I didn't set up a remotely balanced test, but it was fun to get the dice out and the little men running about a bit to see what happened, and I think the rules are at least fairly solid. They certainly call for another test!

The entire short game listed below took two "rounds" in game, and only one hour, which bodes well for a relatively fast playing game as I had desired. They also had a feel of realism, and though I have a few tables to refer to in gameplay, it was not overburdened with paperwork. A few redundant or forgettable rules were highlighted as well, so altogether, a worthwhile endeavour!


We join two sections from the Régiment de la Chaudière as they advance along a country road, towards a small farmhouse believed to be in German hands.

Not only is it held by Germans, there are three whole Gruppe of panzergrenadiers there, ragged from retreating but determined to fight.


Here we have a period photo from the point of view of the Canadians on the road :


The game begins with the MG42 team on the hillside overlooking the road, instructed to give security while the 3 Gruppe performed basic make and mend or training activities, opening up on the Canadians in the open.

They don't hit anyone, but begin to inflict Stress (a cumulative measure of morale effects under my rules) on the Canadian section. I track the stress with a red die, and the actions remaining to the leader with a green die.


The Canadians return fire with a Bren team along the side of the road, and kill the loader for the MG team, applying some stress as well.


With no more units in LoS of each other and wishing to fire, the Canadians run to cover along the orchard hedge on the side of the road, and the German Gruppe in the woods crests the small hill separating them from the second Canadian section. The hardest fighting is about to start, with close range fire exchanged constantly. The Canadians in the woods move through the trees to make themselves harder to hit, and the fire begins. The Canadians are immediately laid into by the Gruppe's full firepower, and take one casualty. However, the stress from firing prompts an Unpredictable Reaction (a roll on a random event table), which allows them to treat his wounds immediately, and not lose one man for a whole round to providing first aid.


The Germans on the hill looking down on the Canadians in the woods.

The Canadians' second Bren team engages the Germans on the hill, and takes out one rifleman, but it isn't enough. The German MG42 in the cabin parking lot opened up on the Canadians by the orchard then, inflicting one casualty and suppressing them.


The Canadians by the Orchard about to receive fire.

As the Germans continue to win the initiative and get lucky with their firing, things for the Canadians, particularly in the woods, go from bad...


to worse...


By the end of round two, the Germans have pinned the troops in the woods as well as the troops by the orchard, and the Canadian section in the woods surrenders, while the other falls back at speed. Their patrol has been defeated and turned away, and quite soundly at that.


The Rearmost German Gruppe prepares to receive prisoners.

As I said before, quick-playing and not inauthentic feeling - however, I need a better scenario to test it on next time!

Let me know if you have questions, or if you want to see more, and I hope to see you back around next time!